
So you know those sponge topped mini eye shadow brushes you might find in some eye shadow palettes? The ones that you can even buy in an 8-pack? Still don't know what i'm talking about?
THIS

If you look closely, you can still see some eye shadow left over from last new years' gold eye shadow.
Please, if you can afford to buy some proper brushes, do so. Like NOW. Not only are these applicators really unhygienic, but this causes the application of eye-shadow to be really unnatural and blotchy.
So, about to go brush shopping? don't know what to get?
No worries, I gotchu guuuurrrl.

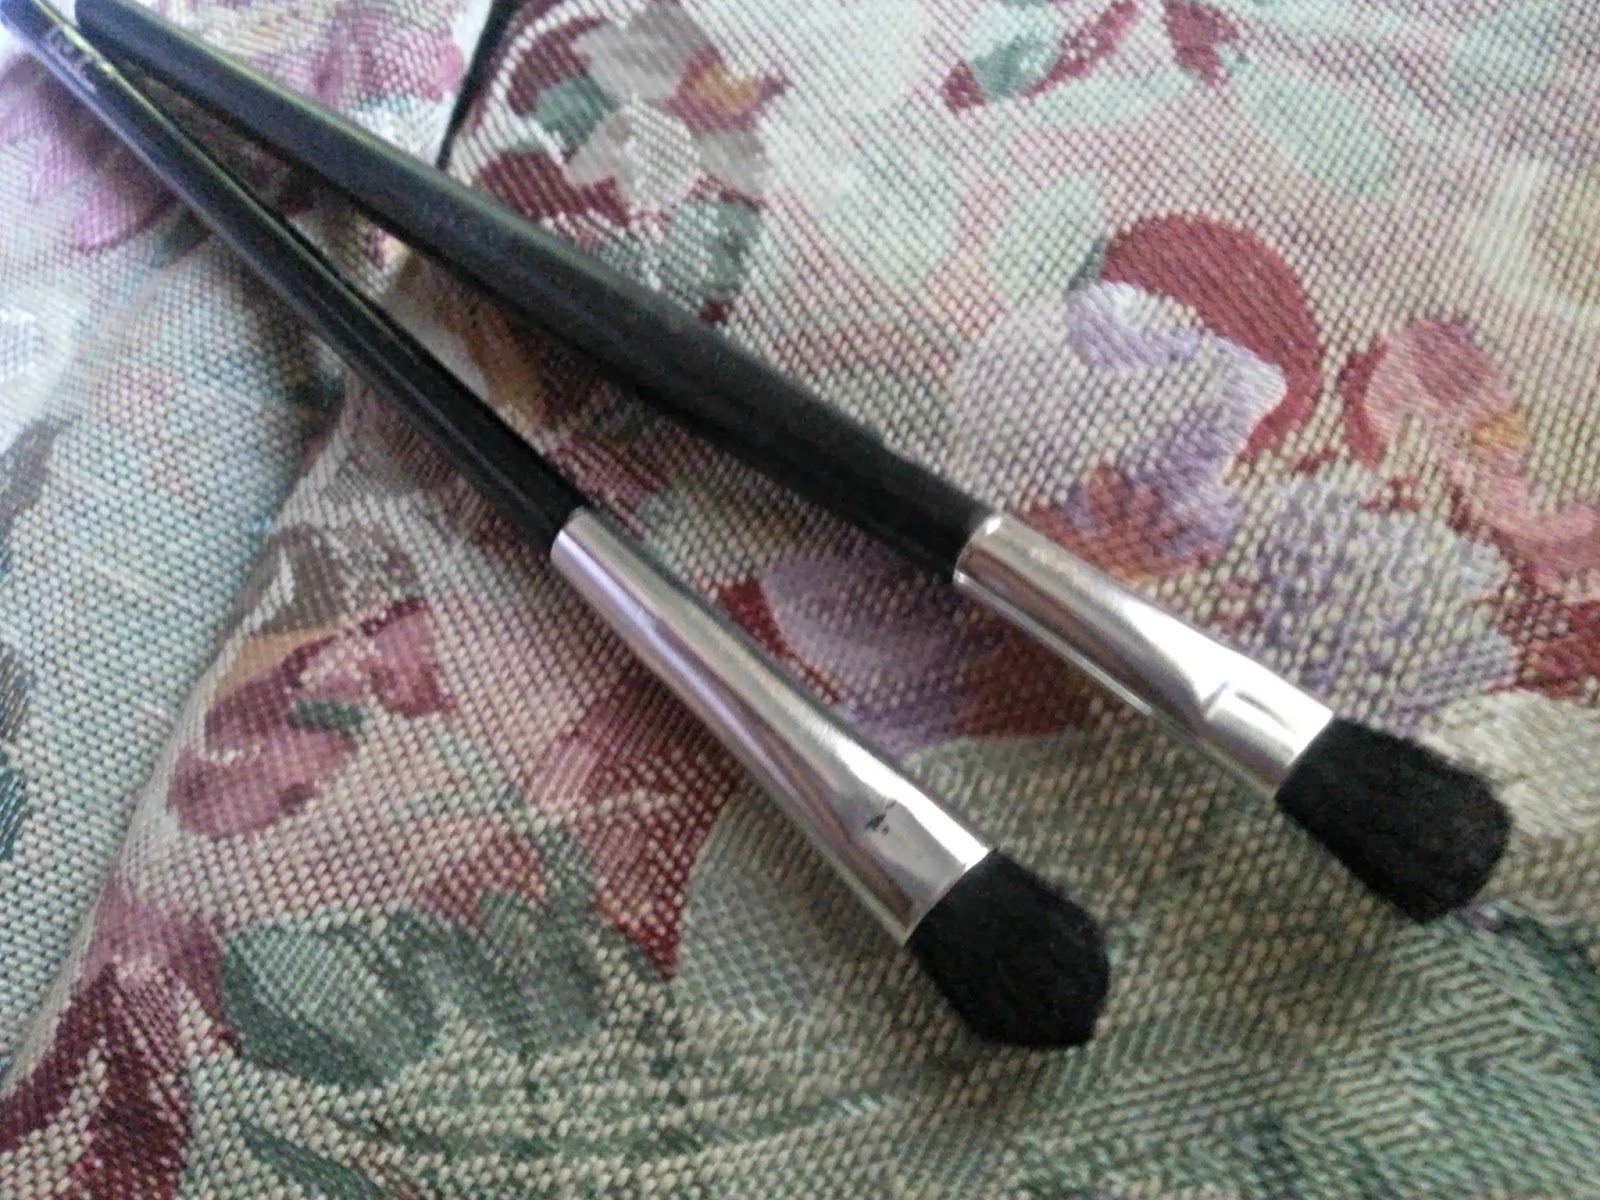
The Eyeliner Brushes:
Say hello to my favorite brush (right, Elf cosmetics). These two are both used for eyeliner. The one on the right is for drawing some sharpie-licious gel lines on your top lid. The brush on the left, flat and square, is for smudging black pencil liner for that smokey eye. Simply draw a rough line on your top or bottom lid, go over it with the flat brush, and BAM
--Smokalicious.

Eyebrow brush:
So this might look like an angled liner brush (no it's not, and I don't like using them).
It's slightly fluffier than an angled brush, and a lot thicker. However, the angle is still there for filling in your brows. I use this brush everyday with some eyebrow powder (looks like brown eye-shadow.. could be brown eye-shadow). Using powder for your brows looks a lot more natural than pencil, so I really suggest switching in for this method.

Flat Angled Brushes:
These are the cheapest brushes you can get (aside from those pesky applicators).
the quality of these doesn't usually affect it's application so you can really go cheap on these. What I suggest is buying different sizes and experimenting on what is most comfortable for you.
To use these, you simply swipe it on a shadow pan and onto your eye lid. NOTICE: I said lid. Not crease. You then use another brush to blend the edges out. The purpose of this brush is to cover surface area. This could also double as your bottom lash shadow brush. Again, super versatile.
The Highlight Brushes:
Not your standard neon yellow highlighter, ladies.
These highlight brushes are used to apply a lighter shadow to the inner corner of your eye and underneath your eyebrows. Notice how the brush at the bottom is slightly angled at the center - perfect for your inner corner. Applying a lighter shade to these areas can lift the eyes, make eyes appear bigger and makes you look younger.

The "Smokey" brush:
Probably the most important brush you need when crafting your smokey eye. You dip this brush into some shadow, and onto your crease. Since this brush is fluffy, you can use a "windscreen wiper motion" to apply it to your crease. This will surely give you that sultry smokey look. NOTICE: Try out different sizes. I've owned several different sizes, and I find the smaller ones (ie. the purple on the left) easier to use.

The Crease Brush:
When I discovered this brush, and started using it, I realized that all my makeup looks looked a lot more professional. How to use it?
Well lets say, you apply some dark shadow on your crease but cant seem to blend it out. Well have no fear, your favorite crease brush is here.
You dip this baby into some light brown shadow and use it as a transition color between your skin color and the dark shadow. It's so soft and fluffy, it'll blend all your shadows together. I promise.
So, are these all the brushes you need?
definitely NOT
There are thousandths of variations of these brushes, and everyone uses them for different purposes. These are the purposes I use them for, perhaps you could use as a starting point. Good-luck finding the brush in shining packaging,
Much more to come,
Vanity&Me
No comments:
Post a Comment